How to Configure WordPress to Send Emails via SMTP
Step-by-step tutorial to configuring WordPress for sending emails through external SMTP.
While WordPress can send emails by default, these emails often fail to reach their intended recipients or end up in the spam folder.
When it comes to sending emails to customers and users through WooCommerce, contact forms, member areas, forums, and more, reliable email delivery is crucial.
In this tutorial, I'll show you how to configure WordPress to use an external SMTP server for sending emails, and the best part is, we'll be using a free service.
Why Use External SMTP Server
If I have an online shop on WordPress, I need a reliable way to send important emails to my customers. These include purchase confirmations, password reset links, and welcome emails when they sign up.
These types of emails are called Transactional Emails , and they're crucial because you always want them to reach your customers on time.
Imagine not getting a password reset link promptly – that wouldn't be ideal, right?
I'm going to explain why using an external SMTP server for sending emails on WordPress is important.
On Shared Hosting
When your WordPress website is on shared hosting, it shares resources with other websites.
Shared hosting means your website is on a server where others have their websites too.
Most shared hosting providers set up their servers to send emails. This means your WordPress website can send emails.
However, because other people share the same server, if someone misuses email sending, it affects all the WordPress websites on that server, including yours.
This might lead to the server's IP address getting blacklisted or blocked, which will affect your email delivery.
On VPS or Dedicated Server
Most server providers block port 25 to prevent misuse for sending spam emails. This means you can't easily configure your server to send emails.
Some providers might open this port if you talk to them about your project, but it's not the best idea. If, for any reason, your server's IP gets blacklisted, it'll affect your email delivery.
Using an external SMTP server from an email service provider (ESP) helps you avoid spam blacklists.
When you send emails through the ESP's server, the recipient's email server checks its IP address, not yours.
So, if your server's IP gets blacklisted, it won't affect your email delivery.
ESPs have a good IP reputation, making your emails less likely to get stuck in blacklists and more likely to reach the recipient.
The "from" Email Address
Normally, WordPress sends notification emails from an address like wordpress@yourdomain.com.
The problem is, that's not a real email address. The trouble is, lots of spam filters think these emails are junk, and they don't even make it to the spam folder. Filters just delete them.
It's really important to use an active email address for sending emails.
This makes your emails look trustworthy like using hello@yourdomain.com or contact@yourdomain.com.
Configuring WordPress to use an external SMTP server for sending emails allows you to change the "from" email address, and I'll cover that in this tutorial.
Security Benefits
By default, WordPress emails lack security. PHP Mail doesn't protect your messages.
This can cause your emails to be treated as spam and not reach your recipient's inbox.
On the other hand, ESPs put in the effort to ensure your emails are secure and reach their destination.
Most ESPs have strong security measures in place, such as SSL or TLS encryption, to keep your emails safe. They invest significantly in maintaining their server reputation, actively watching for any issues.
Free 1000 Monthly Emails with SMTP2GO
There are many ESPs to choose from. Some are paid, and others have both paid and free plans.
This tutorial will use SMTP2GO, which offers a free plan allowing you to send 1000 emails per month.
I’ve been using SMTP2GO for a while now for both production and development projects, and I must say, they’re fantastic.
While I won’t go into a full review, I’d like to highlight some of their excellent features:
- No Credit Card Needed: Unlike other ESPs, SMTP2GO doesn’t require your credit card information for signing up for their free plan.
- Generous Email Limit: With SMTP2GO’s free plan, you can send up to 1000 emails monthly, which is significantly more than what many other ESPs offer.
- User-Friendly Dashboard: Their dashboard is user-friendly and makes it easy to add a domain and set up everything you need.
- Exceptional Support: SMTP2GO’s support team is top-notch. They respond quickly and are willing to help with any questions, even if they’re not directly related to their services.
And, it’s worth noting that I’ve never encountered any issues with their service.
SMTP2GO Setup
To get started, you’ll need to sign up for a free account on SMTP2GO.
Visit the smtp2go.com website and click on Try SMTP2GO Free.
A pop-up will appear, prompting you to enter your work email address, not a shared one like @gmail.com or @hotmail.com.
After entering your work email, click on Continue and provide your full name and password.
You’ll receive an activation email to confirm your email address.
Open the email and follow the instructions to activate your account at SMTP2GO, completing the signup process.
After you've activated your account, you'll be taken to your account dashboard, which looks like the picture below.
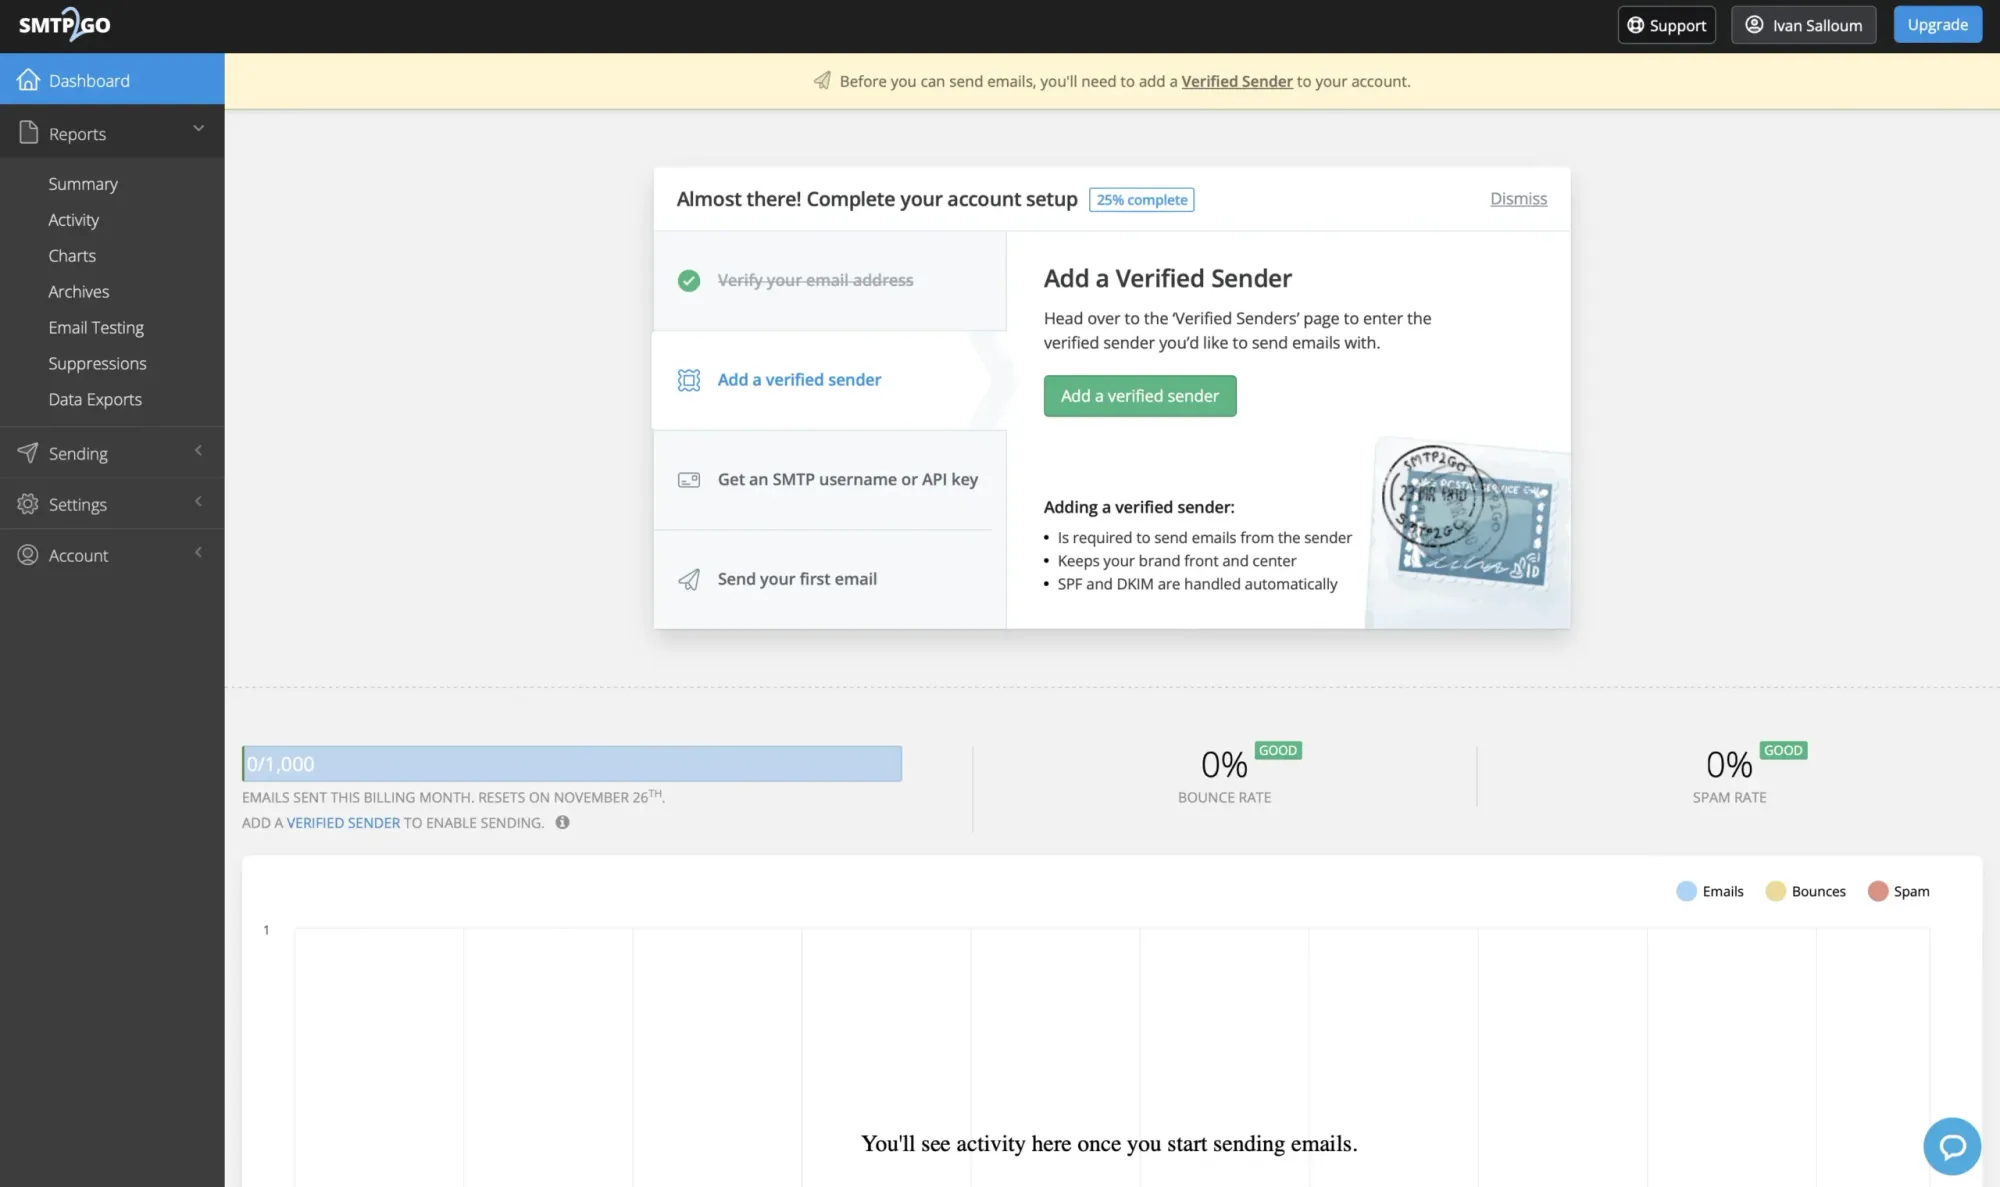
Click on Add a verified sender , which will open a new page where you can specify the domain from which you want to send emails, as shown in the picture below.
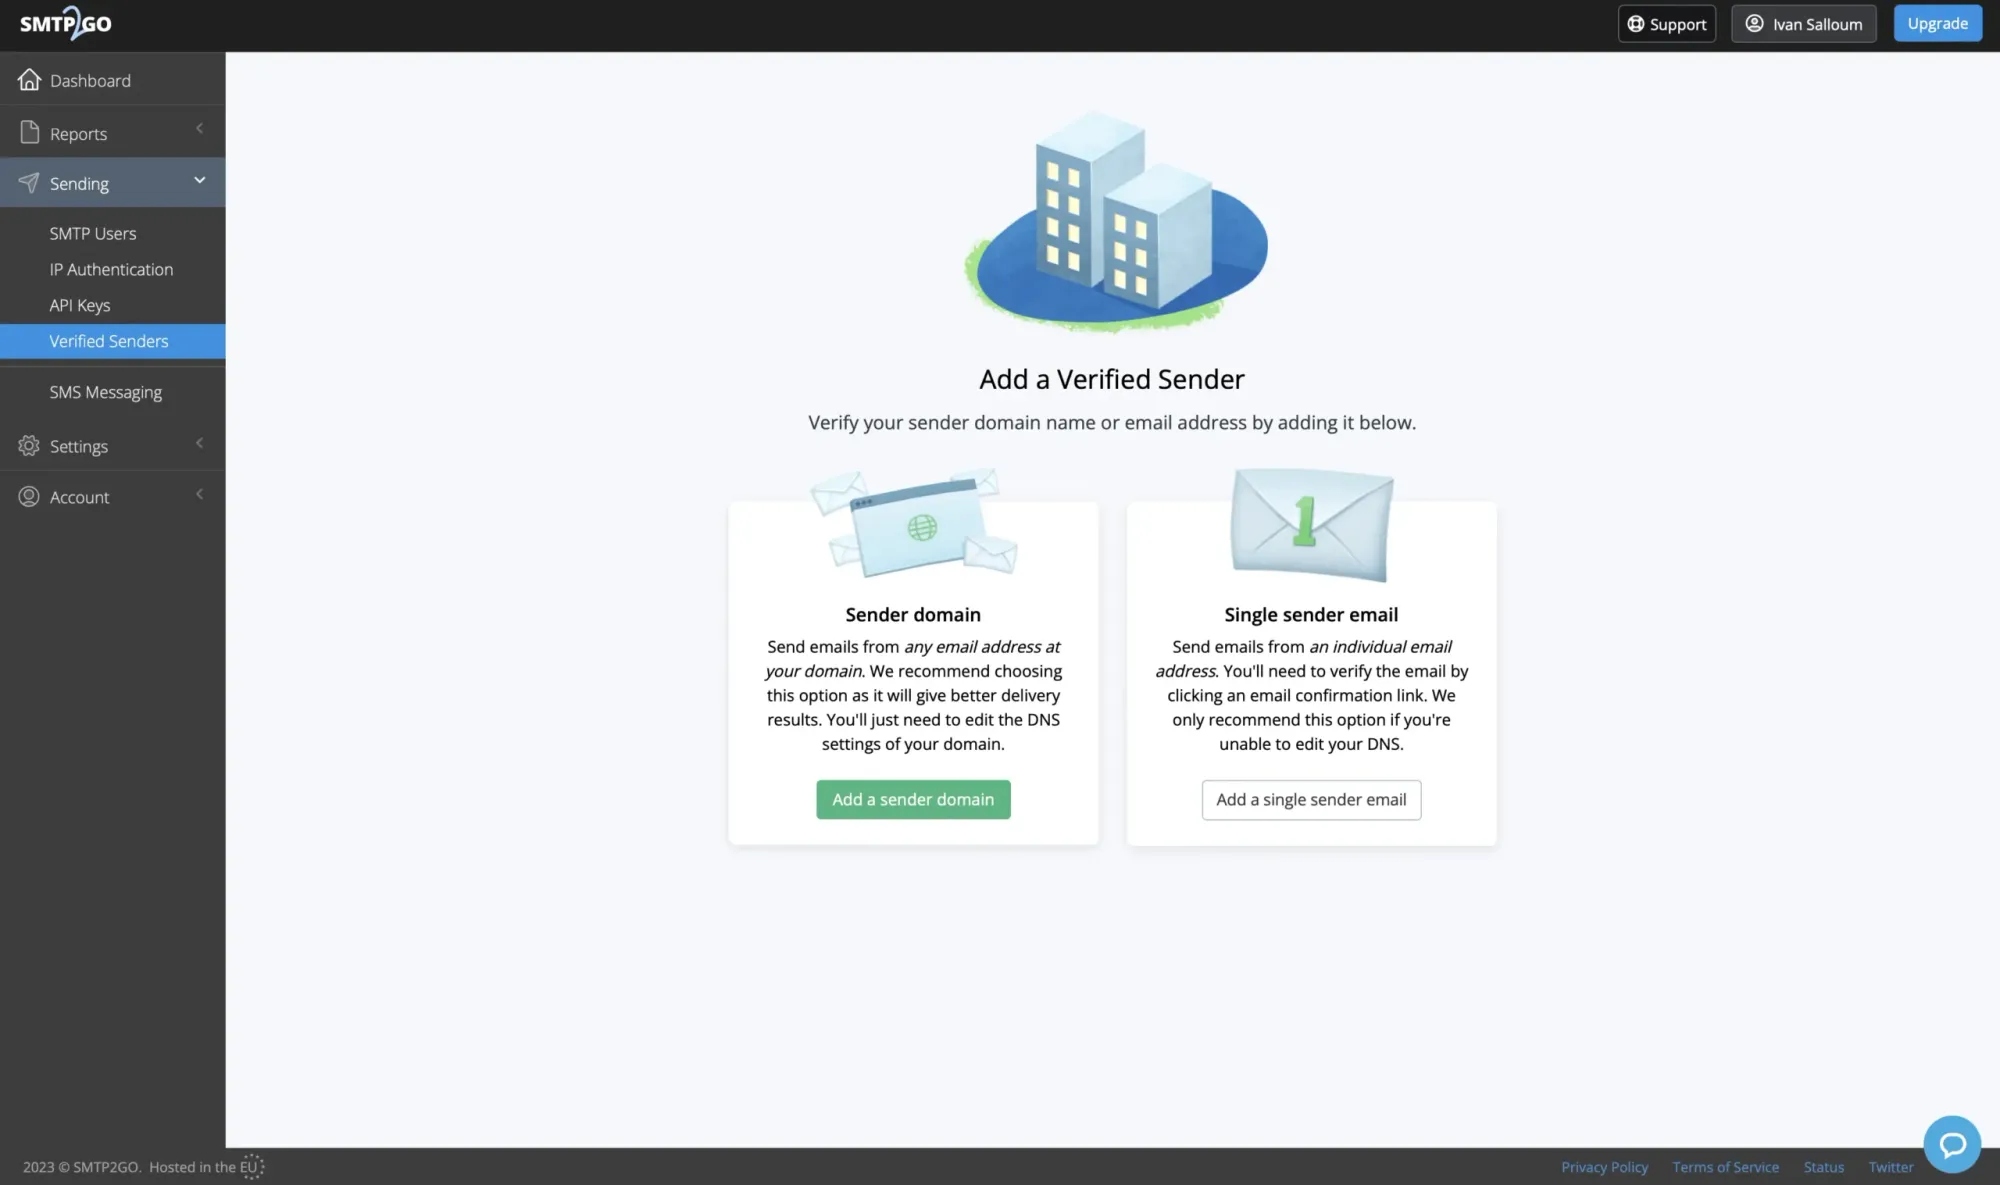
You have two choices: Sender domain and Single sender email.
Opt for Sender domain and click on Add a sender domain.

Enter your desired domain and click Continue with this domain.
Next, you’ll need to configure DNS records for the domain you’re adding.
SMTP2GO will automatically detect your DNS provider. In my case, it’s Cloudflare.
You’ll need to add just three CNAME records, as illustrated in the picture below.
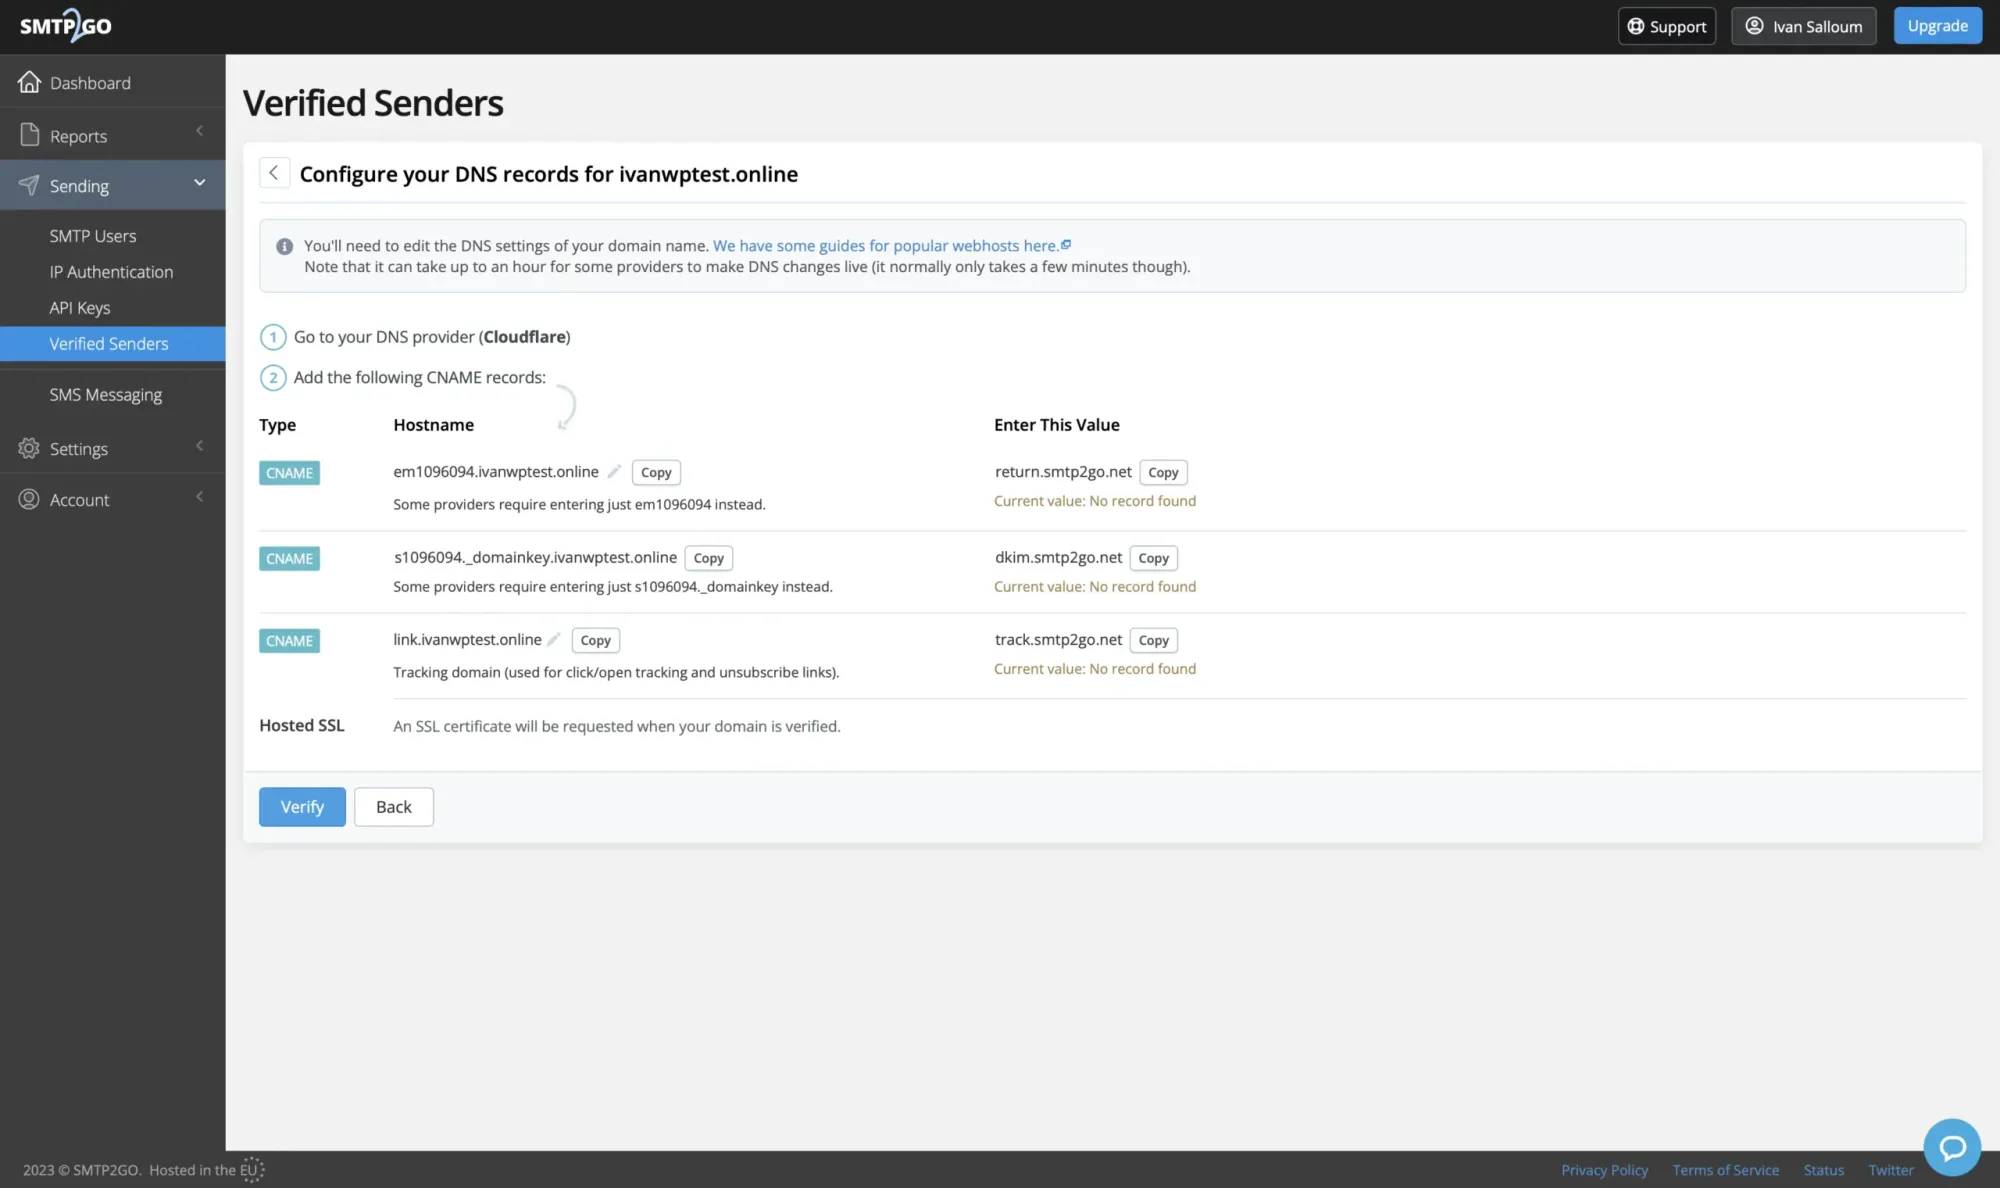
Once the records are added, click Verify to proceed. Be patient, as it may take a few minutes for the records to take effect.
After that, SMTP2GO will automatically generate an SSL certificate for your domain.
Now that your domain is verified, the final step is to add an SMTP user.
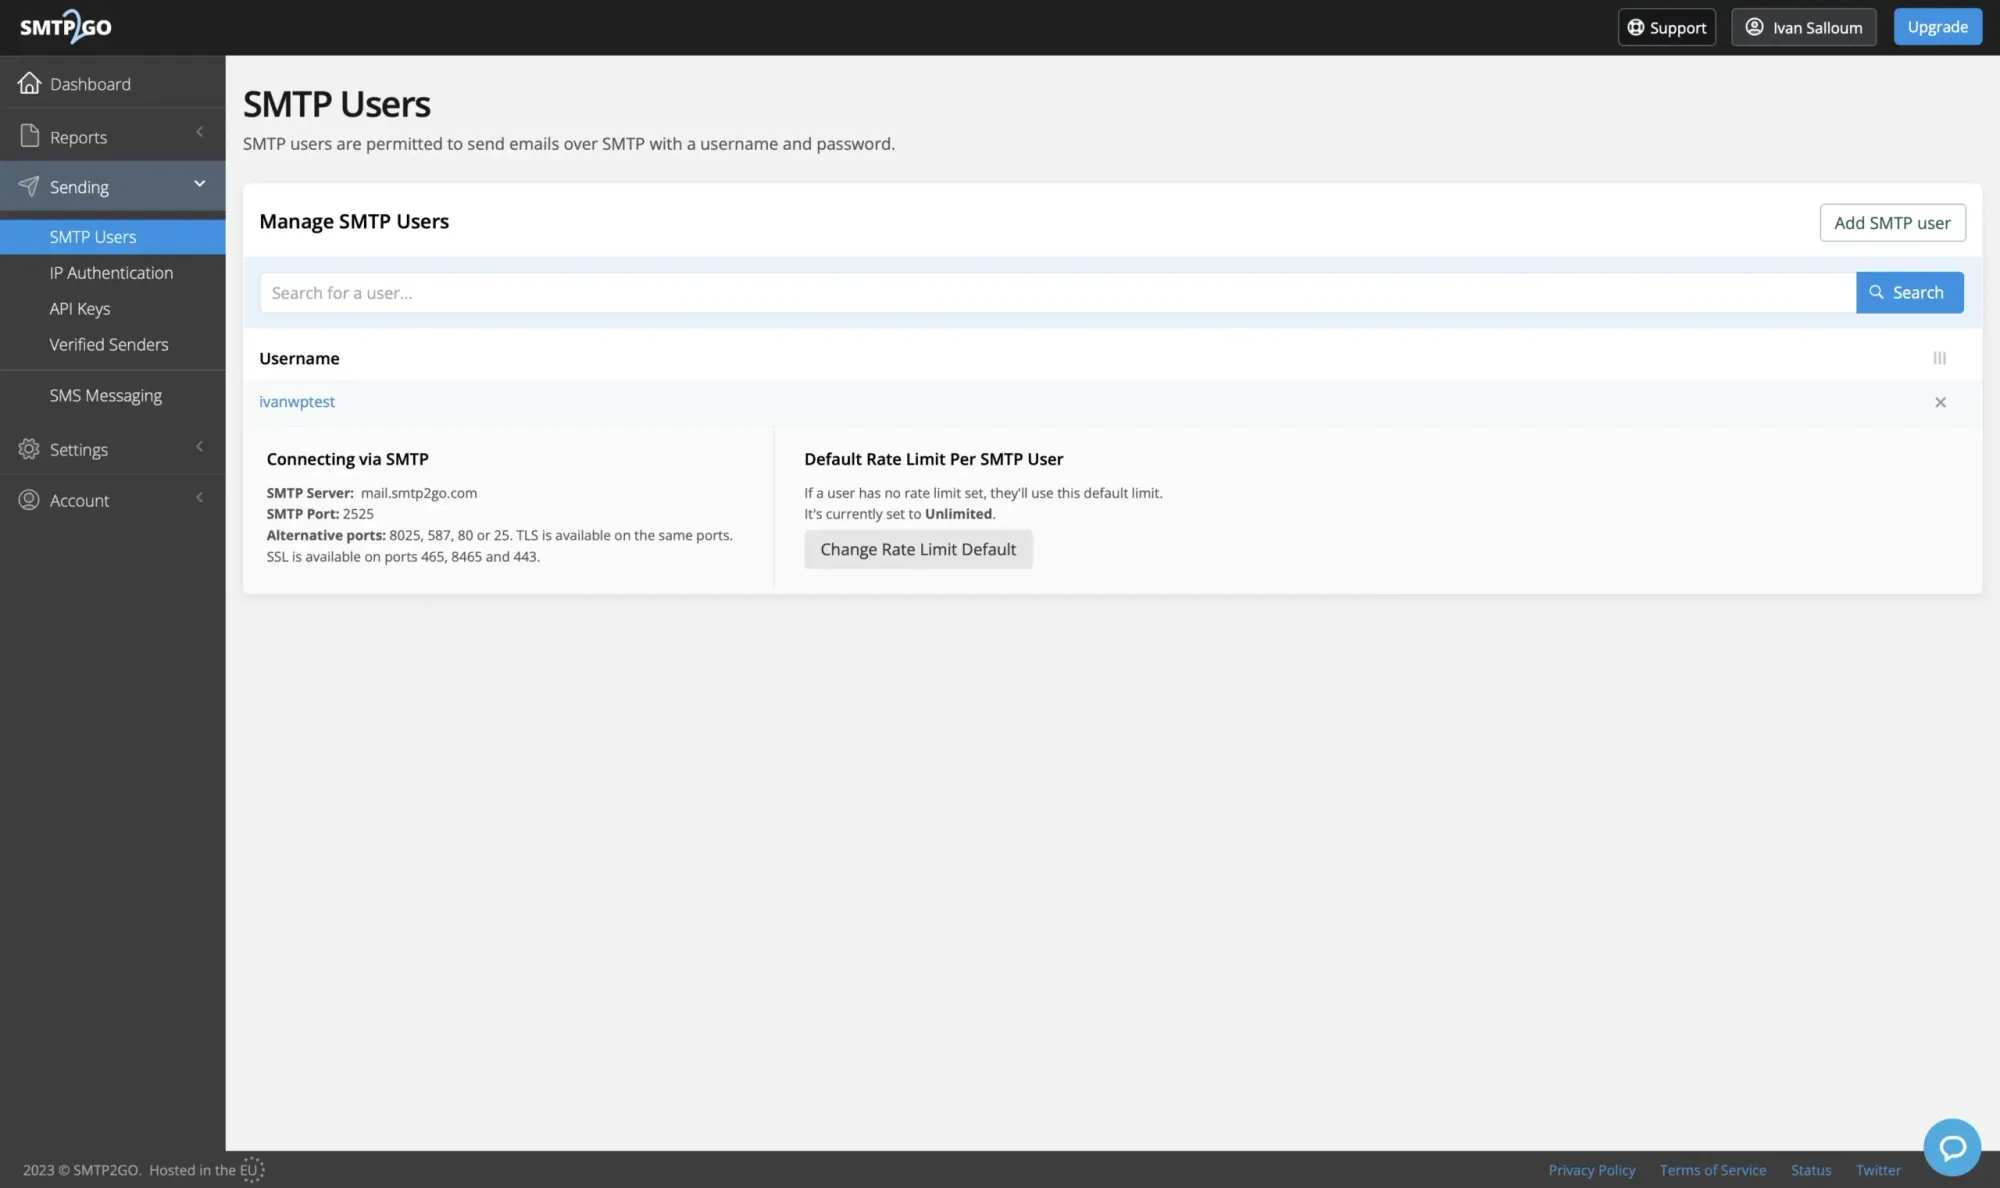
Navigate to the SMTP Users page under the Sending dropdown menu on the left-hand side and select Add SMTP user.
Choose a username and password, and if desired, provide a description, then click on Add SMTP User.
On the same page, you will also find the SMTP server information and the user you’ve just created. Keep this page open because we’ll need it later for the Postfix setup.
With this, we've completed the necessary setup, and we're ready to start configuring WordPress to use the SMTP2GO SMTP server.
Configuring WordPress
Configuring WordPress to use an external SMTP server for sending emails can be done with various plugins.
Some popular options include WP Main SMTP by WPForms, SMTP Mailer, and Easy WP SMTP.
However, in this tutorial, we'll use FluentSMTP, which, in my opinion, is the best SMTP plugin for WordPress.
FluentSMTP is open source, meaning it's free, with no paid features.
It's lightweight and user-friendly, offering in-depth reporting, email logs, the ability to resend emails, and real-time email delivery.
Let's get started.
First, you need to install and activate the FluentSMTP plugin.
After activation, go to its settings under Settings » FluentSMTP to set it up.
You'll see a welcome message and a list of ESPs to choose from, as shown in the picture below.

Since SMTP2GO isn't listed, select the Other SMTP option.
This will take you to a new page.
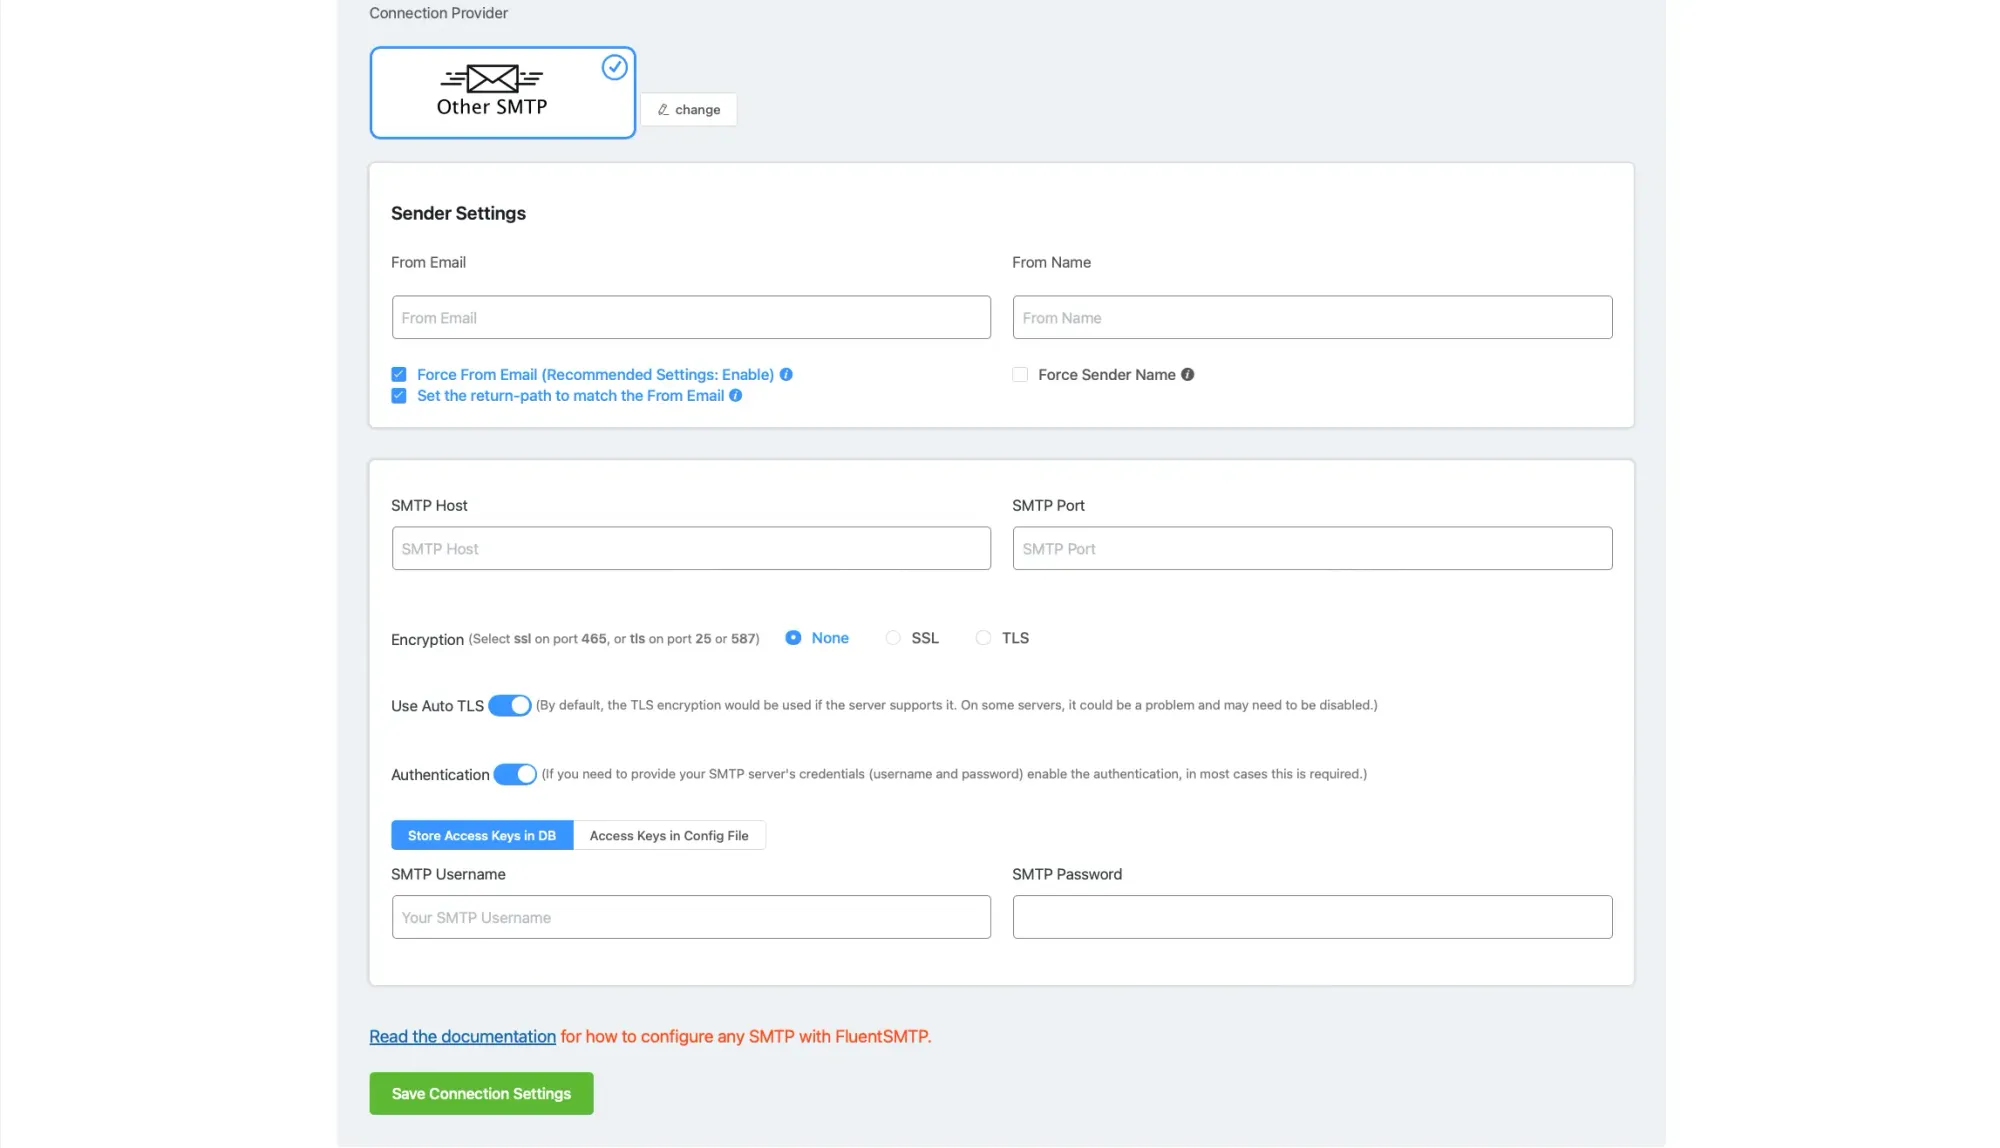
Here, you'll need to enter the From Email and From Name.
The From Email you enter will take the place of the default email WordPress uses, which is wordpress@yourdomain.com.
Make sure the email address you use is functional, and that your domain has the correct DNS records in place. Enter a working email address and your name or brand name.
Example: This website's domain is ivansalloum.com. I've added this domain to SMTP2GO and selected the Sender domain option, just like we did in this tutorial. This means I can send emails from any email associated with this domain. In my case, it could be hello@ivansalloum.com, contact@ivansalloum.com, or anyname@ivansalloum.com.
The key is to make sure that any email address I use for sending emails is valid and has an active inbox.
You'll also have three options to enable: Force From Email , Force Sender Name , and Set the return-path to match the From Email.
I, along with FluentSMTP, recommend enabling the first option to ensure all emails are sent from the sender's domain. You can also enable the second option to force the sender's name.
The last option is crucial. Enable it to receive notifications in case an email fails to send due to recipient issues. If this option is disabled, you won't be notified.
Now, it's time to fill in the SMTP Host and SMTP Port fields.
Remember, I mentioned earlier to keep the page open where you added your first SMTP user. You'll find all the necessary information about their SMTP server there.
For SMTP Host , enter:
mail.smtp2go.comFor SMTP Port , enter:
2525SMTP2GO uses port 2525 for their SMTP server. Other ESPs use different ports, like 587.
If you have trouble with port 2525, SMTP2GO has some other options to use, like 8025, 587, 80, or 25.
Next, choose the TLS encryption option. Don't forget to enable Use Auto TLS and User Authentication.
FluentSMTP, by default, stores the SMTP username and password in the database in an encrypted format, which is highly recommended. This keeps your information secure in the database.
Lastly, enter your SMTP Username and SMTP Password , which you created from the SMTP2GO dashboard, and then click on Save Connection Settings.
Conclusion and Final Thoughts
And there you have it!
Now your WordPress emails are set to hit the inbox reliably with the help of an external SMTP server and the FluentSMTP plugin.
I hope this tutorial has been of great help to you.
If you found value in this tutorial or have any questions or feedback, please don't hesitate to share your thoughts in the discussion section.
Your input is greatly appreciated, and you can also contact me directly if you prefer.