How to Configure Postfix for External SMTP Relay
Learn step-by-step how to set up Postfix for external SMTP relay using SMTP2GO for secure and efficient email delivery.
Postfix serves as a Mail Transfer Agent (MTA).
You can configure it to specialize in sending emails, which is valuable for sending routine email notifications.
In this tutorial, I'll explain how to set up Postfix to send up to 1000 emails per month using a free SMTP relay service.
_I assume you're working on a properly set-up Ubuntu server. If not, check out my guide on preparing Ubuntu servers _ to get started.
Why Use External SMTP Relay?
Most server providers block port 25 to prevent misuse for sending spam emails.
However, you can work around this limitation by using an external SMTP relay. An external SMTP relay uses a different port, allowing you to send emails externally.
External SMTP relay means your servers don't send emails directly. Instead, it relies on another server, often called a relay host, to send your emails for you.
This approach offers several advantages, including bypassing anti-spam blacklists.
When an email is sent via an external SMTP relay, the recipient's email server checks the relay host's IP address, not yours.
This distinction is crucial because if your server's IP gets blacklisted for any reason, it won't affect your email delivery.
As external SMTP relay services typically maintain a positive IP reputation, your emails are more likely to bypass IP blacklists and successfully reach their intended recipients.
In addition to ensuring reliable email delivery, using SMTP relay services can also save you time and money.
Instead of dealing with the complexities of setting up and maintaining a dedicated SMTP server, opting for a trusted SMTP relay service provides peace of mind.
Consider this scenario: If I have an online shop, I need a reliable way to send important emails to my customers. These include purchase confirmations, password reset links, and welcome emails when they sign up.
These types of emails are called Transactional Emails , and they're crucial because you always want them to reach your customers on time.
Imagine not getting a password reset link promptly – that wouldn't be ideal, right?
Free 1000 Monthly Emails with SMTP2GO
Many Email Service Providers (ESPs) can serve as a relay host for Postfix.
Some of these are paid, while others offer both paid plans and free plans that remain free forever.
This tutorial will use SMTP2GO, which offers a free plan allowing you to send 1000 emails per month.
I've been using SMTP2GO for a while now for both production and development projects, and I must say, they're fantastic.
While I won't go into a full review, I'd like to highlight some of their excellent features:
- No Credit Card Needed: Unlike other ESPs, SMTP2GO doesn't require your credit card information for signing up for their free plan.
- Generous Email Limit: With SMTP2GO's free plan, you can send up to 1000 emails monthly, which is significantly more than what many other ESPs offer.
- User-Friendly Dashboard: Their dashboard is user-friendly and makes it easy to add a domain and set up everything you need.
- Exceptional Support: SMTP2GO's support team is top-notch. They respond quickly and are willing to help with any questions, even if they're not directly related to their services.
And, it's worth noting that I've never encountered any issues with their service.
SMTP2GO Setup
To get started, you'll need to sign up for a free account on SMTP2GO.
Visit the smtp2go.com website and click on Try SMTP2GO Free.
A pop-up will appear, prompting you to enter your work email address, not a shared one like @gmail.com or @hotmail.com.
After entering your work email, click on Continue and provide your full name and password.
You'll receive an activation email to confirm your email address.
Open the email and follow the instructions to activate your account at SMTP2GO, completing the signup process.
After you've activated your account, you'll be taken to your account dashboard, which looks like the picture below.
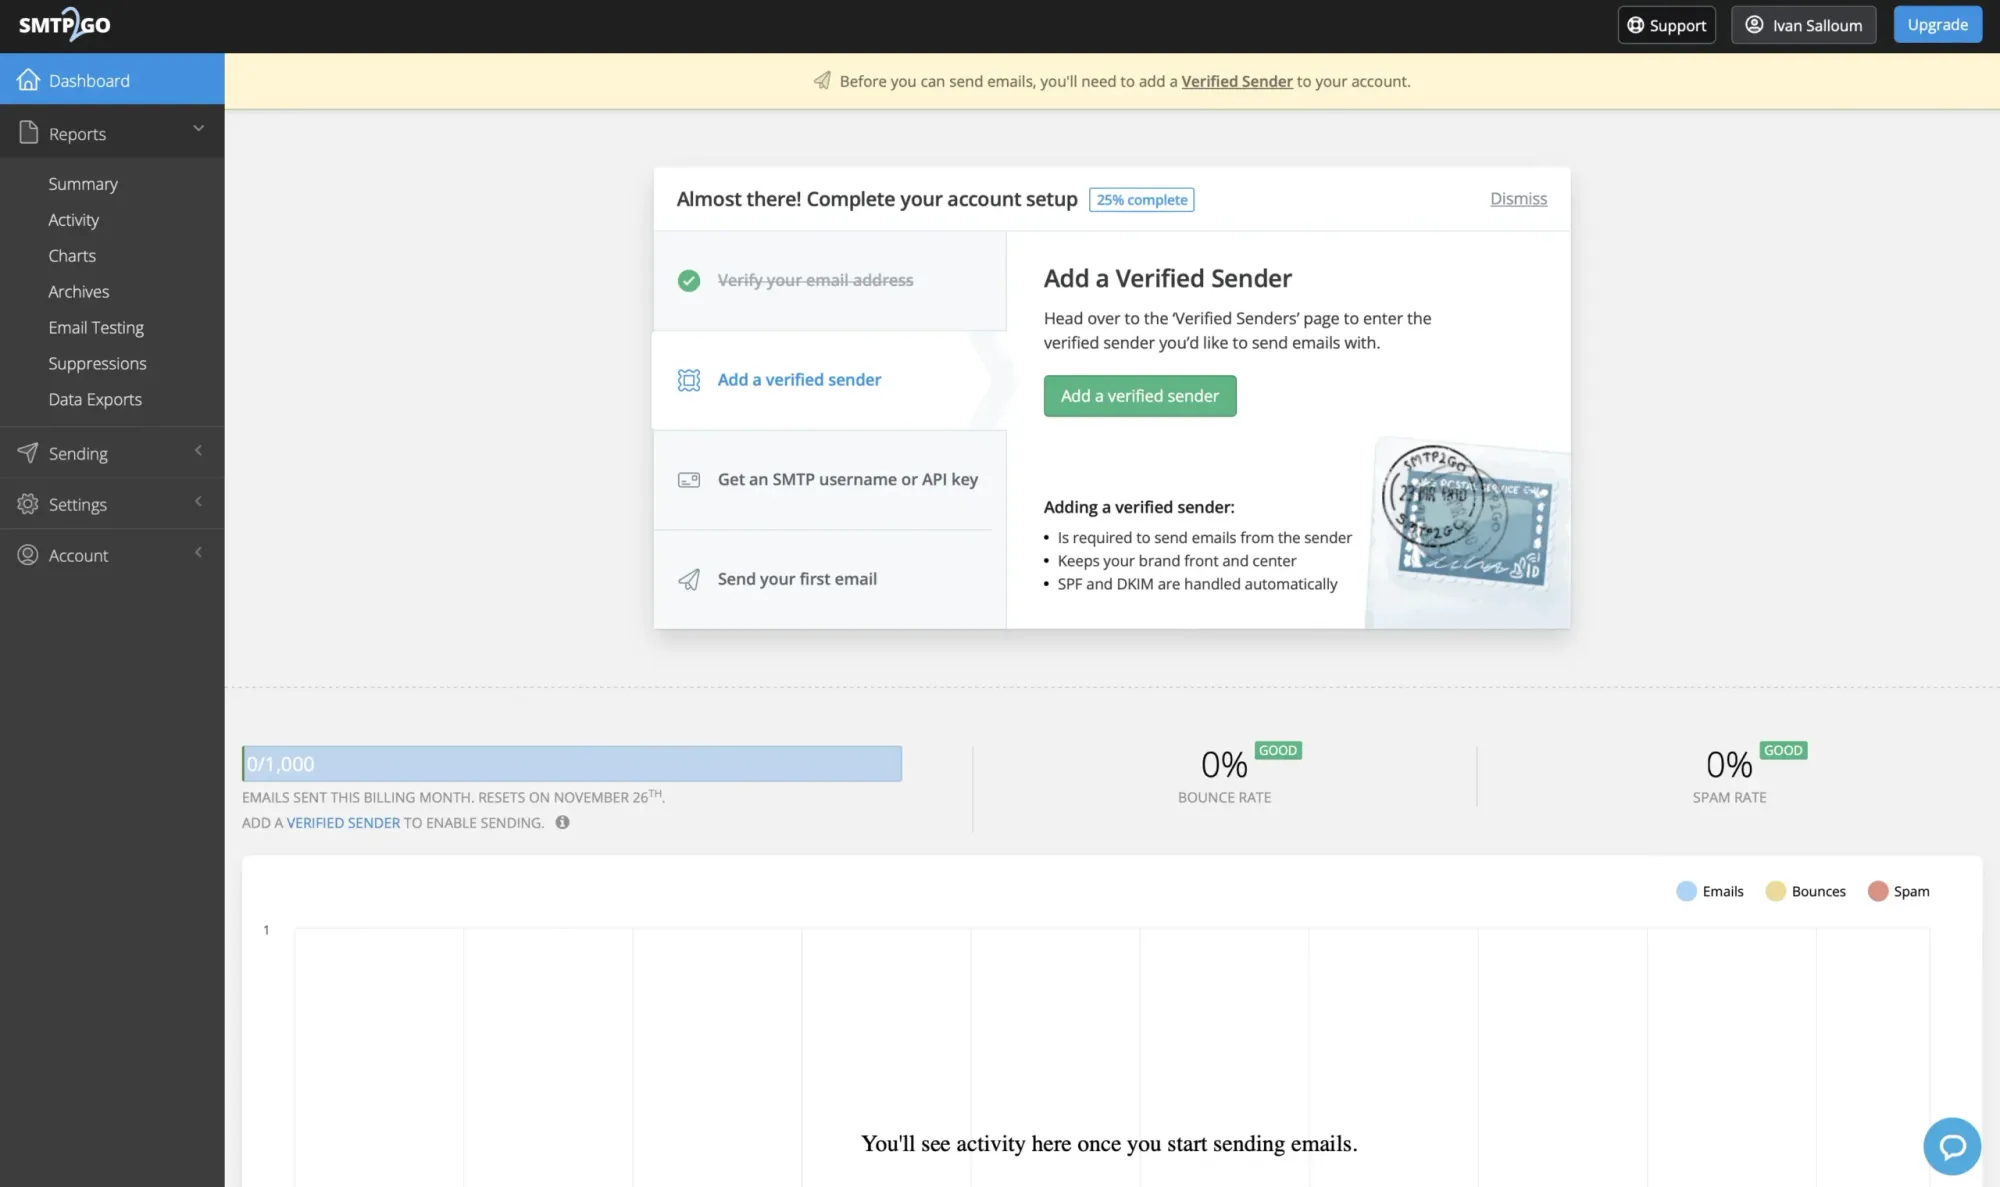
Now, let's prepare everything for our Postfix setup.
Click on Add a verified sender , which will open a new page where you can specify the domain from which you want to send emails, as shown in the picture below.
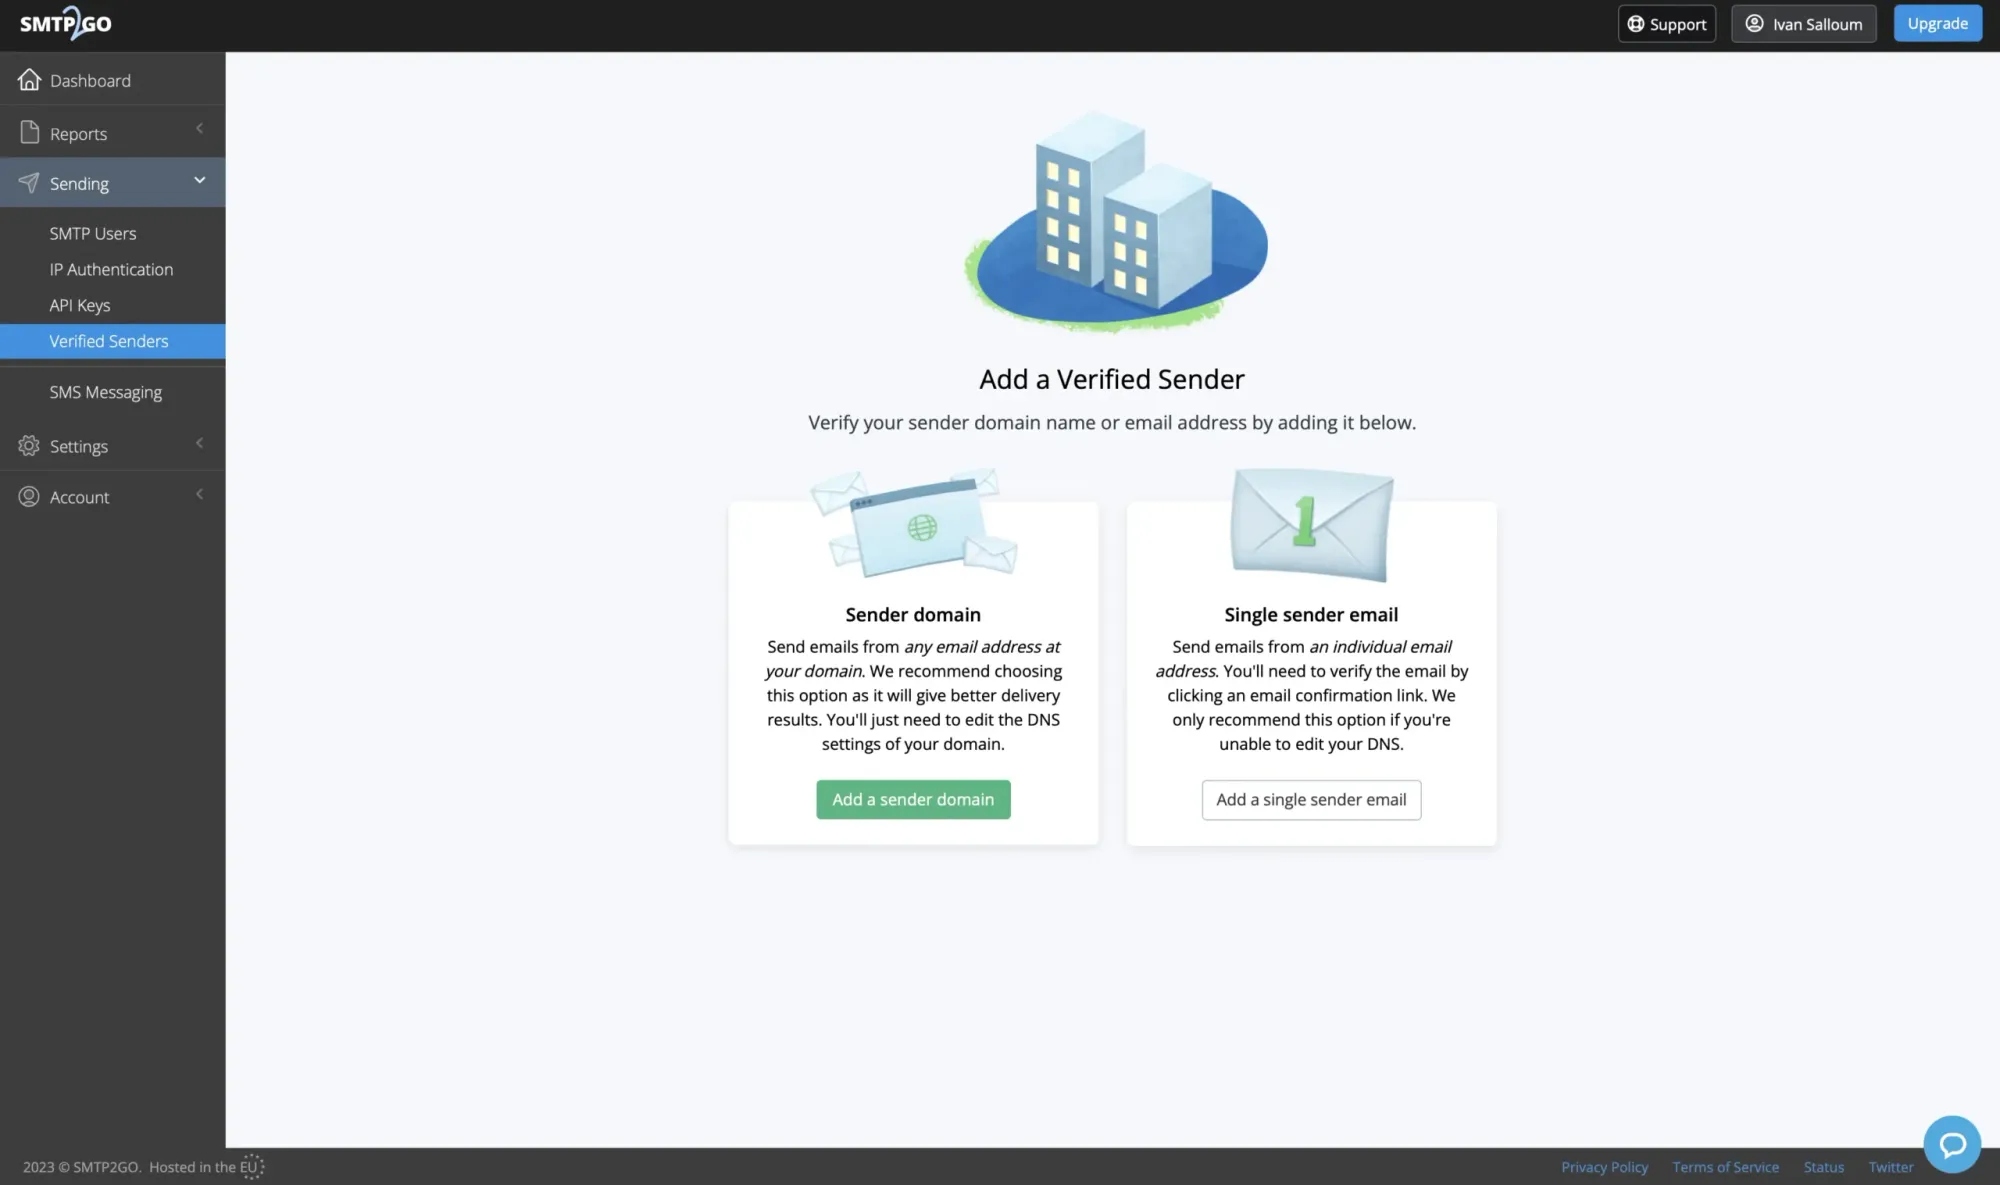
You have two choices: Sender domain and Single sender email.
Opt for Sender domain and click on Add a sender domain.

Next, you'll need to configure DNS records for the domain you're adding.
SMTP2GO will automatically detect your DNS provider. In my case, it's Cloudflare.
You'll need to add just three CNAME records, as illustrated in the picture below.
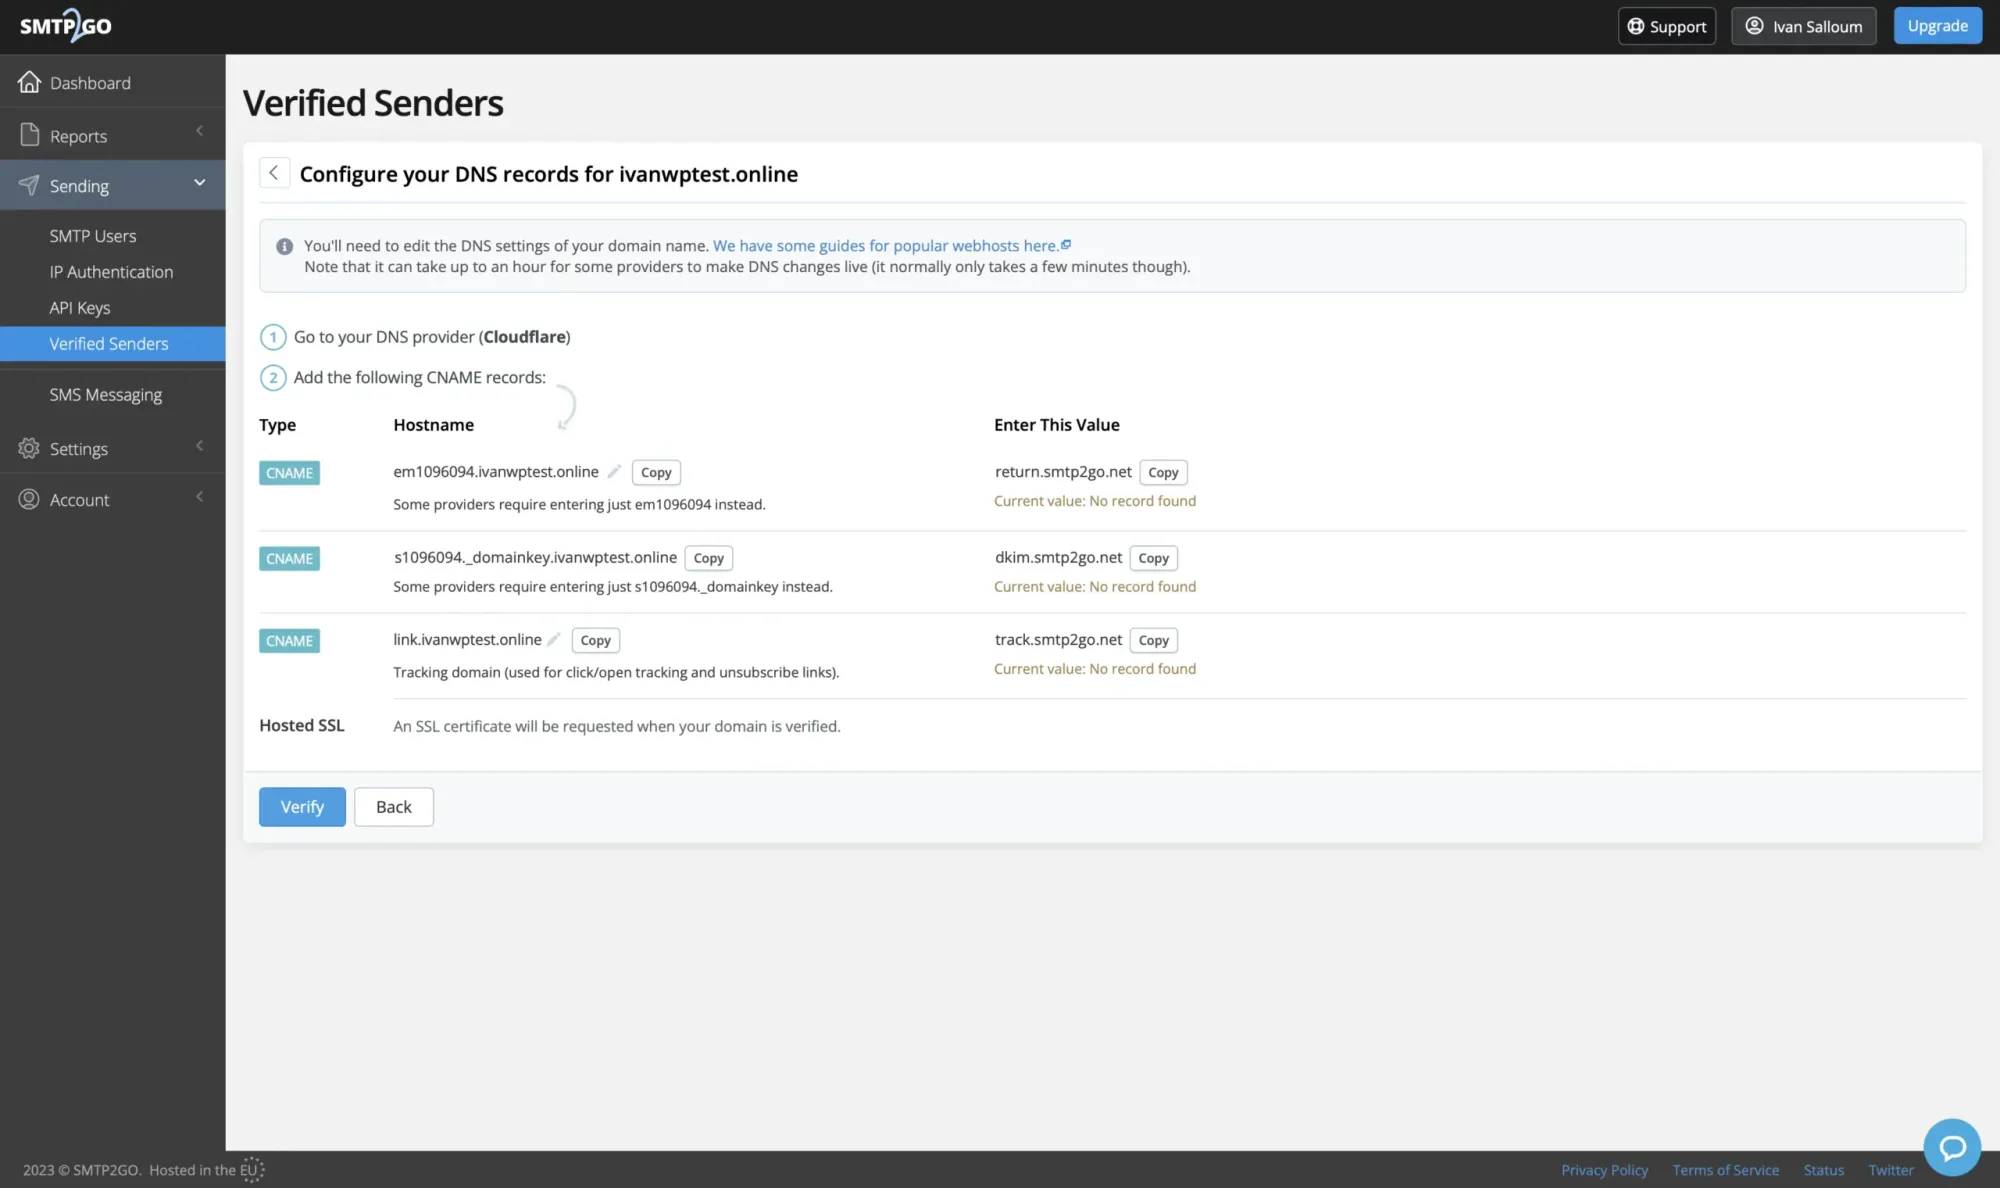
Once the records are added, click Verify to proceed. Be patient, as it may take a few minutes for the records to take effect.
After that, SMTP2GO will automatically generate an SSL certificate for your domain.
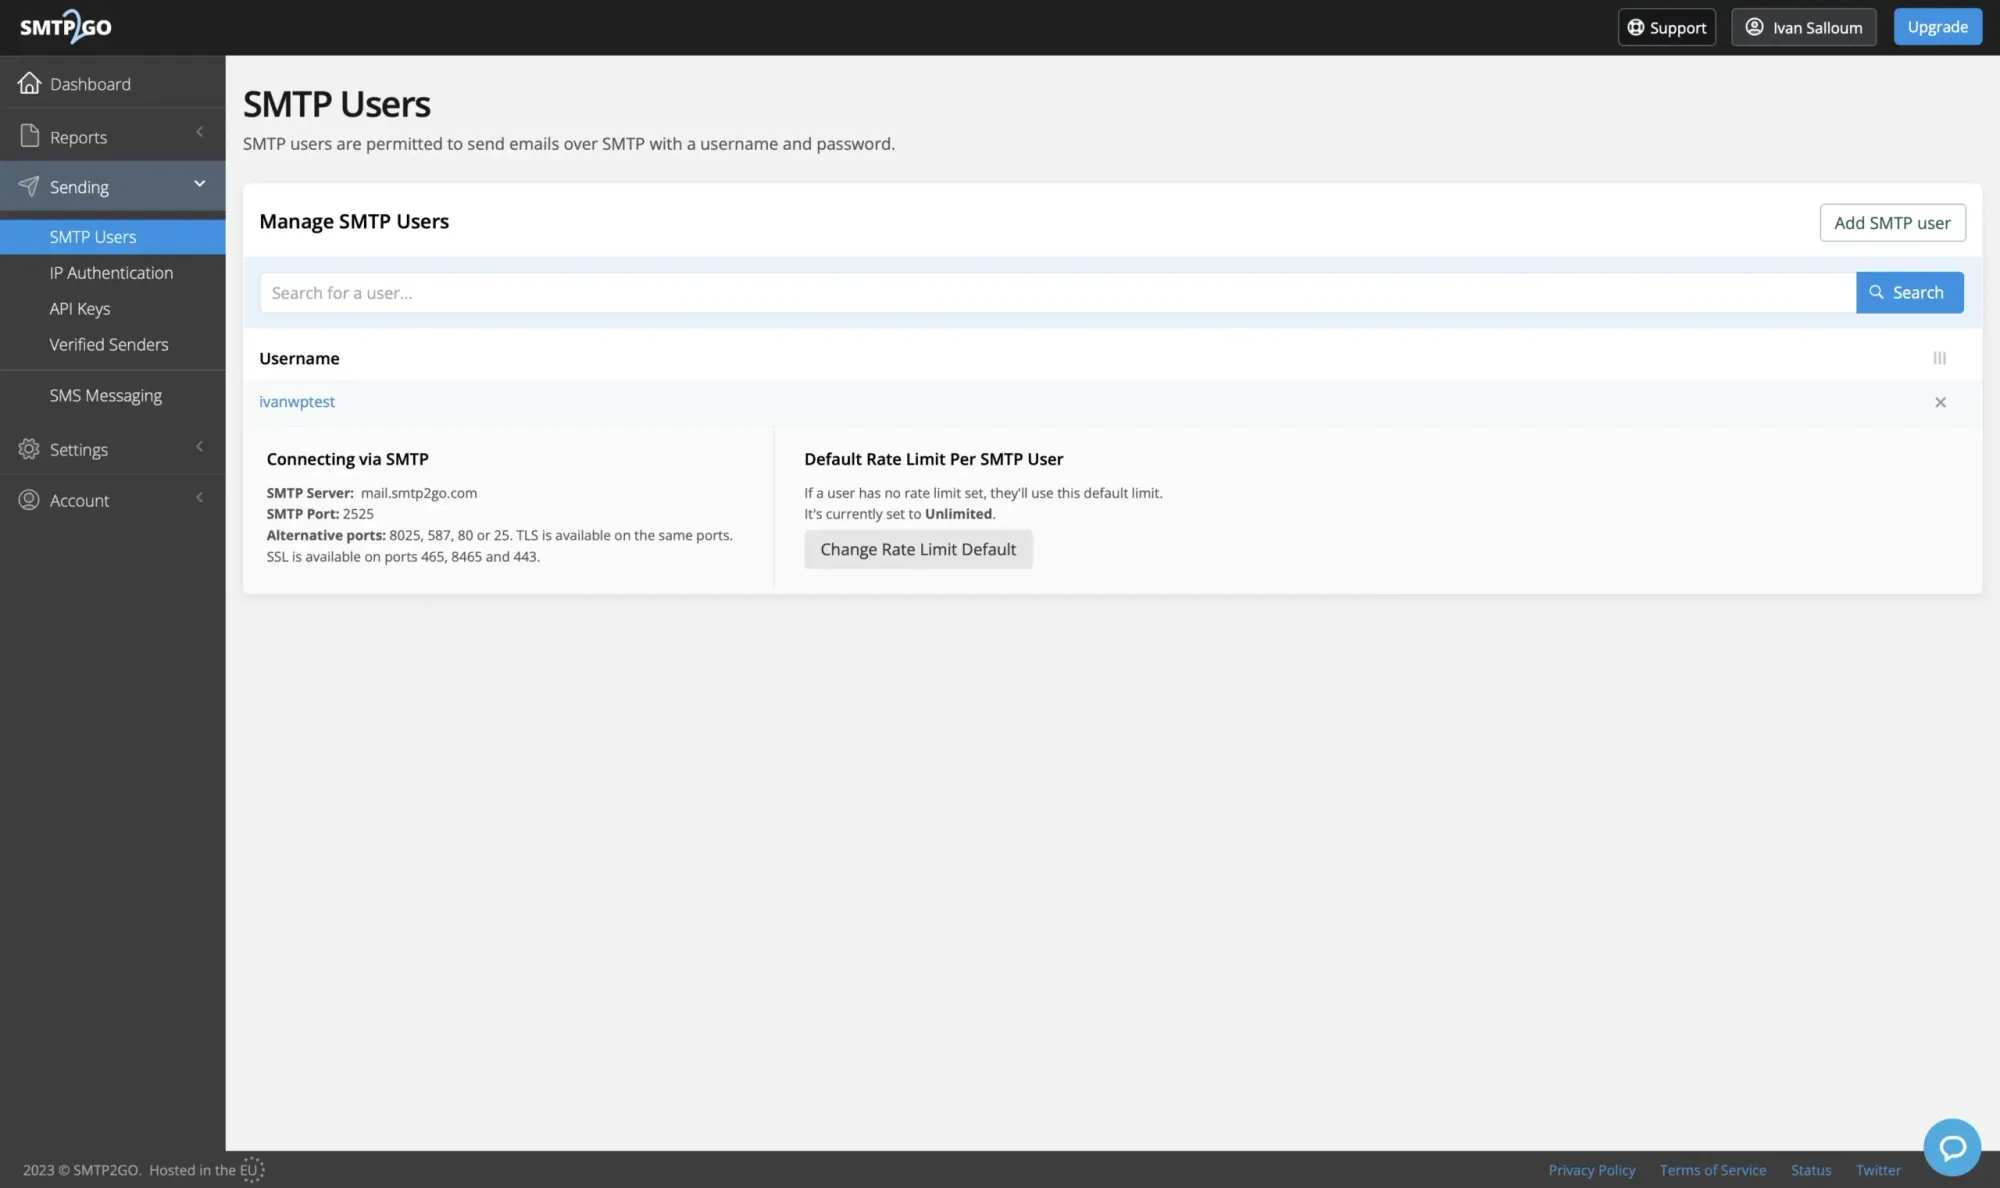
Now that your domain is verified, the final step is to add an SMTP user.
Navigate to the SMTP Users page under the Sending dropdown menu on the left-hand side and select Add SMTP user.
Choose a username and password, and if desired, provide a description, then click on Add SMTP User.
On the same page, you will also find the SMTP server information and the user you've just created. Keep this page open because we'll need it later for the Postfix setup.
With this, we've completed the necessary setup, and we're ready to start configuring Postfix.
Configuring Postfix
Let's start installing and configuring Postfix to use the SMTP2GO SMTP server as a relay host.
First, we'll install Postfix with the following command:
sudo apt install postfix libsasl2-modulesThe libsasl2-modules package helps with something called Simple Authentication and Security Layer (SASL), which makes sure programs can securely send emails through a relay server.
It's important when setting up Postfix as a relay host.
During the installation process, a pop-up window will appear, prompting you to select a General mail configuration type , as illustrated in the picture below.
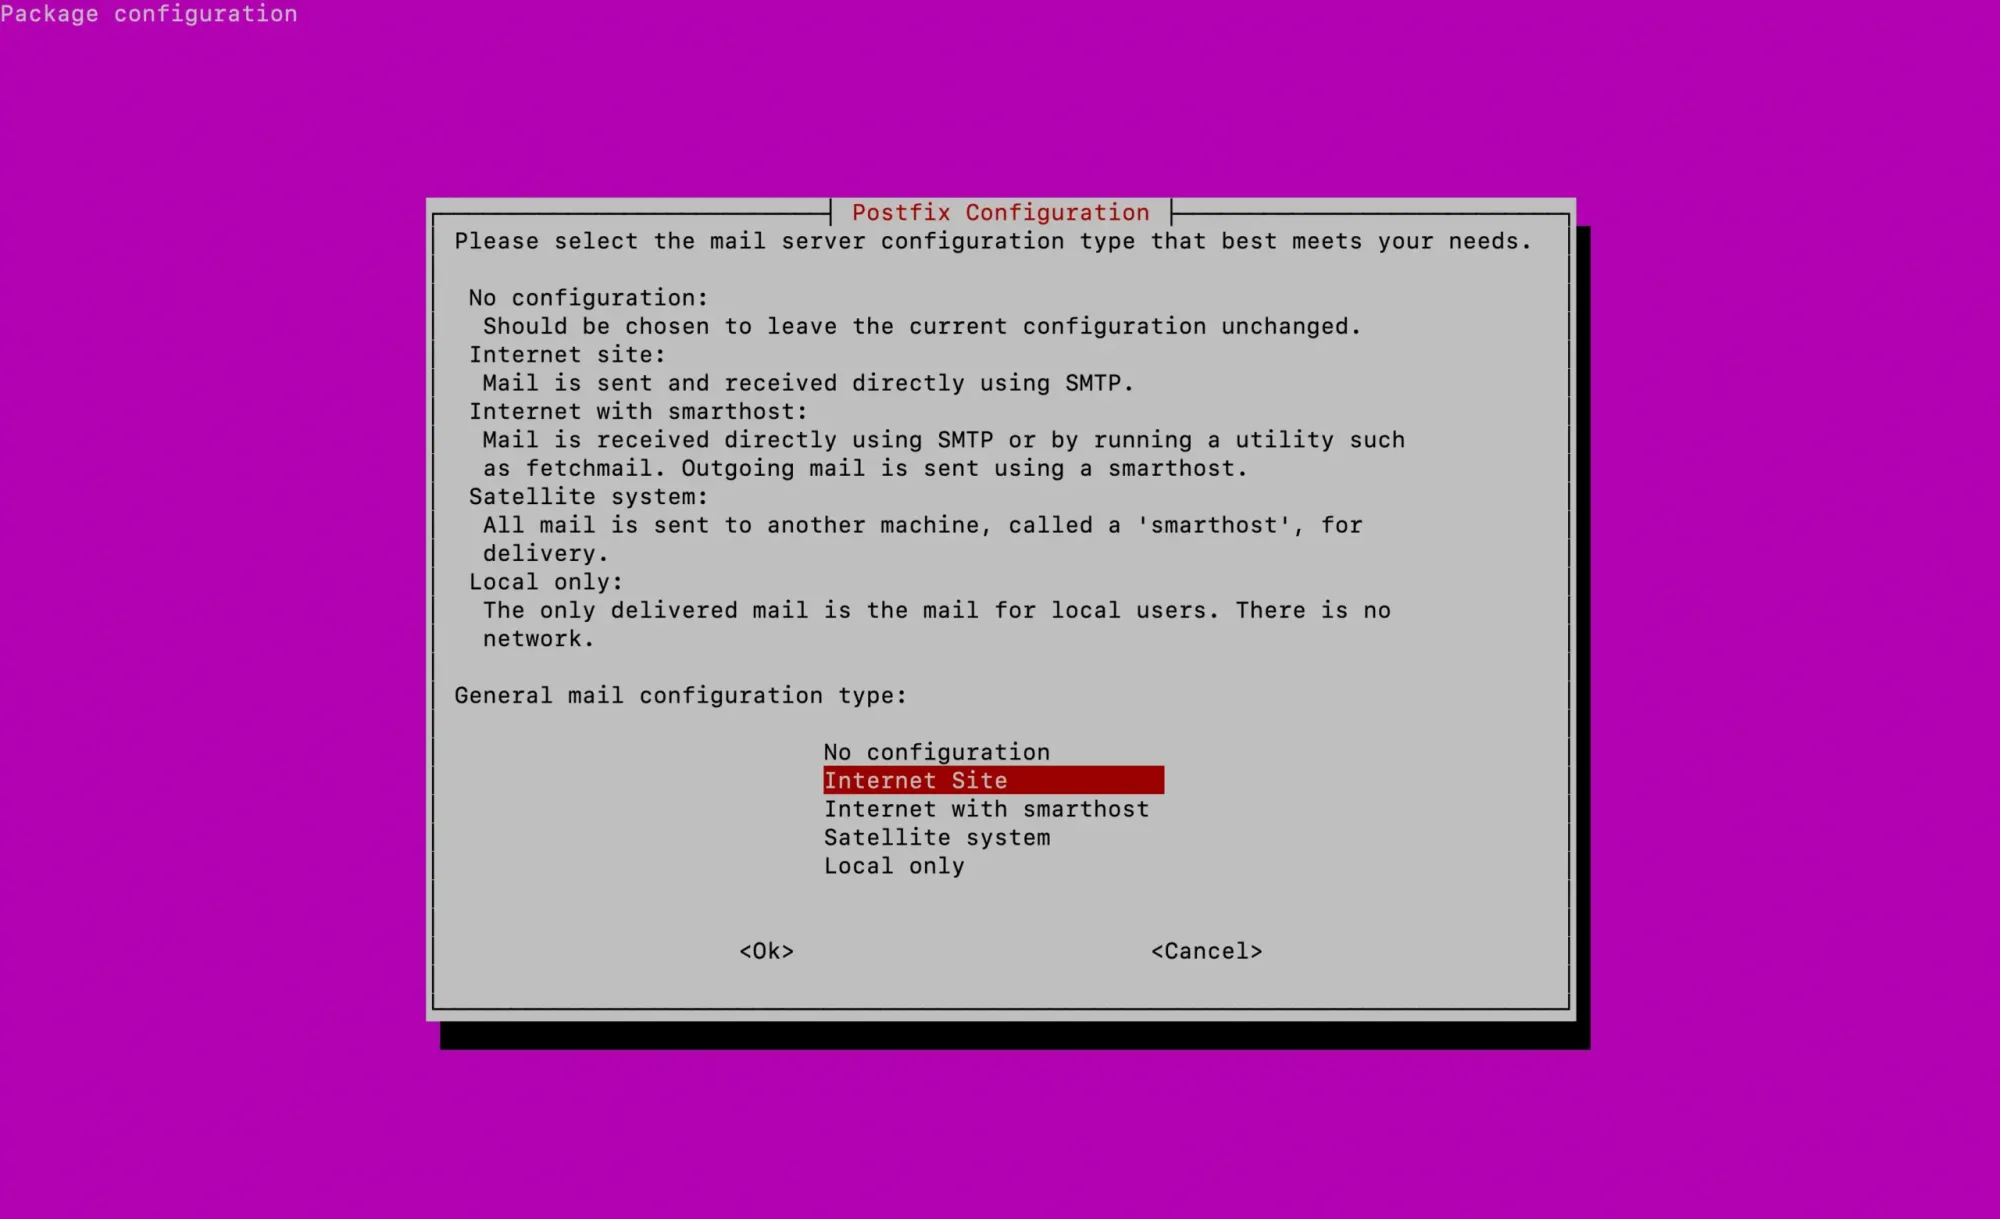
Choose the Internet Site option.
Following this, you'll be asked to input your System mail name , which should be your domain name, as shown in the picture.
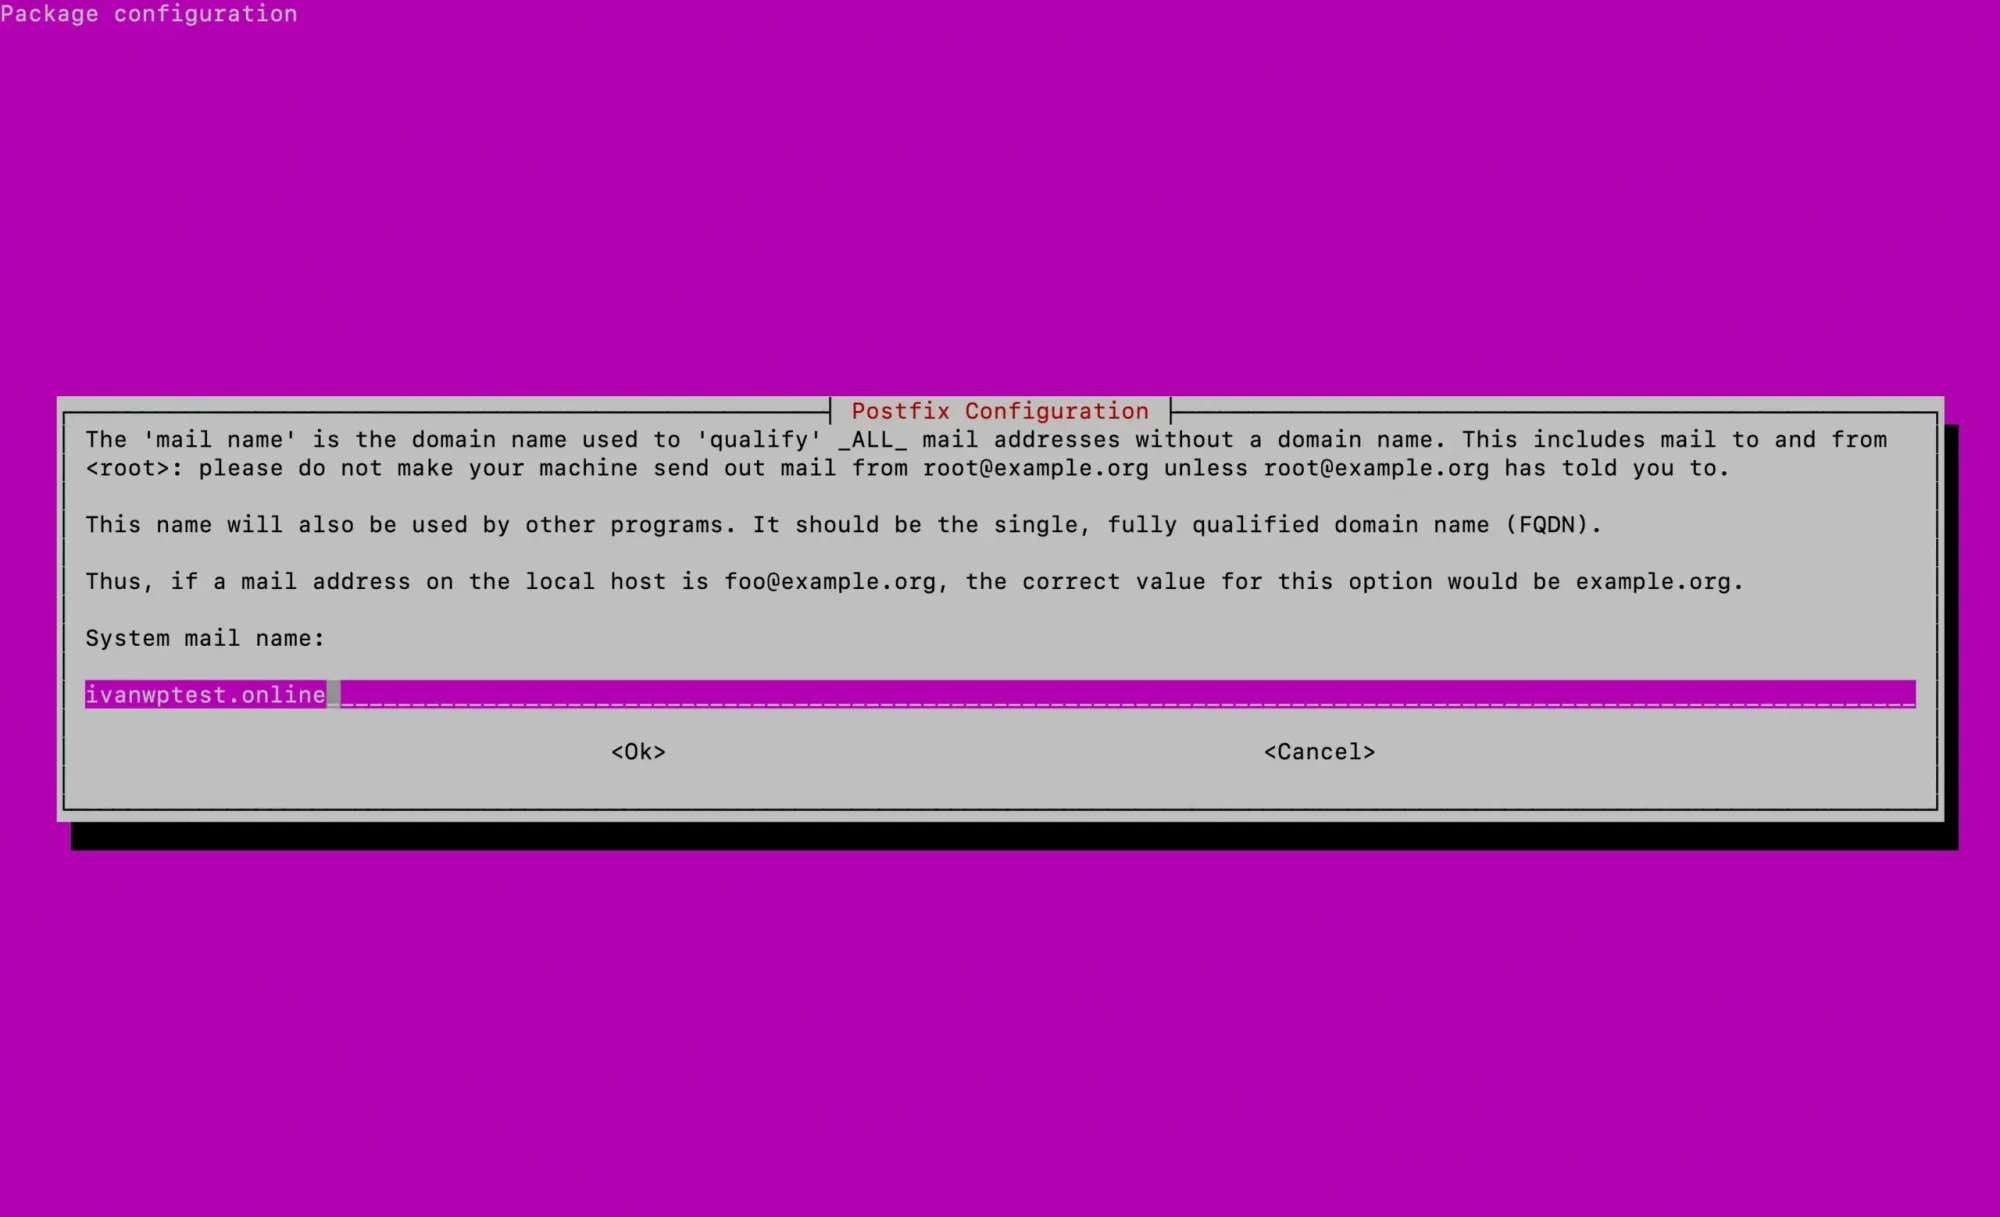
Once you've done this, the installation process will continue until it's complete.
After Postfix is installed, open the main configuration file by using the following command:
sudo vim /etc/postfix/main.cfAt the end of the file, you'll come across a line that starts with relayhost = and has an empty value, which is the default.
In our case, this value should be set to the SMTP2GO SMTP server that we want to use as a relay host.
Remember, I mentioned earlier to keep the page open where you added your first SMTP user. You'll find all the necessary information about their SMTP server there.
Now, set the relayhost value to mail.smtp2go.com:2525, as shown below:
relayhost = mail.smtp2go.com:2525SMTP2GO uses port 2525 for their SMTP server. Other ESPs use different ports, like 587.
If you have trouble with port 2525, SMTP2GO has some other options to use, like 8025, 587, 80, or 25.
Next, add the following lines to the end of the file:
smtp_sasl_auth_enable = yes
smtp_sasl_password_maps = static:yourSMTP2GOUsername:yourSMTP2GOPassword
smtp_sasl_security_options = noanonymous
smtp_tls_security_level = may
header_size_limit = 4096000
relay_destination_concurrency_limit = 20
Replace yourSMTP2GOUsername and yourSMTP2GOPassword with the SMTP user and password you created.
Here's what each directive means:
smtp_sasl_auth_enable: enables SASL authentication.smtp_sasl_password_maps: tells which username and password to use for SASL authentication.smtp_sasl_security_options: controls the security options for SASL authentication.noanonymousensures that authentication isn't anonymous. A valid username and password must be provided to authenticate, just like the SMTP2GO SMTP user you added earlier.smtp_tls_security_level: sets how safe email encryption should be. "may" means that TLS encryption is optional, and if the receiving server supports it, the connection will be encrypted.header_size_limit: specifies the maximum allowed size for email headers in bytes.relay_destination_concurrency_limit: decides how many connections Postfix can make to the relay destination at the same time when sending email.
Don't forget to restart Postfix for the changes to take effect:
sudo systemctl restart postfixNow, the last thing we need to do is to install the mailutils package, as it provides the mail command used by many programs to send emails.
If you don't install it, several programs won't be able to send you emails, such as Unattended Upgrades.
To install it, use the following command:
sudo apt install mailutilsBy following these steps, you've successfully configured Postfix to use SMTP2GO SMTP server as a relay host.
Now, it's time to test our setup.
Testing Our Setup
We can test our Postfix setup by using the mail command to send a test email and check if our server is now able to send emails.
However, it's crucial to note something.
It's very important that your server's hostname matches the domain you have added to SMTP2GO and intend to use.
For example: If my domain is ivansalloum.com, my hostname should be set to server.ivansalloum.com or whatever.ivansalloum.com.
Otherwise, if the domain doesn't match your server's hostname, you will get an error when sending an email which you could examine in the /var/log/mail.log file.
Now, something else you should note.
If we use the mail command directly from the command line, the From header would be user@hostname.
For example: If I use the mail command directly from my terminal using root and my hostname is server.ivansalloum.com, the From header would be root@server.ivansallom.com.
Now the emails should reach their destination, but they might end up in the spam folder.
We only use the mail command for testing.
If the emails end up in the spam folder, it still shows that our server can send emails.
However, emails generated from programs like email alerts and sent from your server will not land in spam.
This is because the From header will show as root@ivansalloum.com, which appears like a real address, even if there's no active mailbox for the root user.
For example, email reports sent from Unattended Upgrades won't land in the spam folder.
Now, let's use the mail command:
sudo mail -s hello@ivansalloum.comThis will send an email from the root user to hello@ivansalloum.com.
If it lands in the spam folder, no problem, as I only want to know if my server is able to send emails.
Conclusion and Final Thoughts
And there you have it!
Now you know how to configure Postfix to be a super reliable email sender using a free SMTP relay service.
I hope this tutorial has been of great help to you.